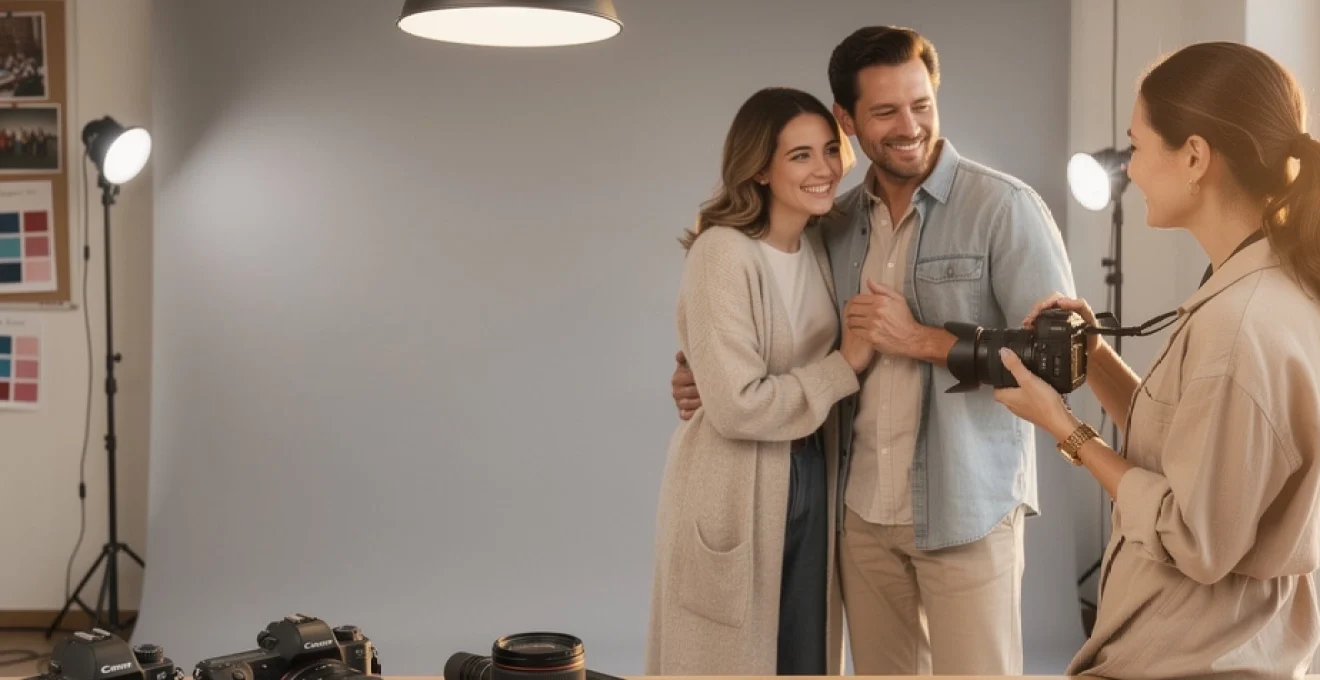
Photography has evolved from a luxury service into an essential tool for preserving life’s most precious moments. Professional photo sessions offer more than mere image capture; they create tangible memories that families treasure for generations. The art of offering exceptional photography services requires mastering technical expertise, understanding client needs, and delivering an experience that transforms fleeting moments into lasting legacies.
Modern photography extends far beyond pointing a camera and pressing a button. Professional photographers must balance artistic vision with technical precision, ensuring every session produces images that truly capture the essence of their subjects. Whether documenting family milestones, celebrating achievements, or marking special occasions, the photographer’s role encompasses being both artist and memory architect.
The demand for professional photography services continues growing as people recognise the irreplaceable value of professionally captured memories. Quality photographs become family heirlooms, passed down through generations as visual narratives of love, growth, and shared experiences. This increasing appreciation for professional photography creates opportunities for photographers who understand how to deliver exceptional results consistently.
Professional photography equipment selection for client sessions
The foundation of memorable photography lies in selecting appropriate equipment that consistently delivers exceptional results across various shooting conditions. Professional photographers must invest in reliable camera systems, versatile lenses, and dependable lighting equipment to meet diverse client requirements.
Canon EOS R6 mark II vs sony α7 IV camera body performance
Camera body selection significantly impacts the final image quality and shooting experience during professional sessions. The Canon EOS R6 Mark II excels in dynamic range performance, delivering exceptional colour reproduction and impressive low-light capabilities with its full-frame sensor. Its advanced autofocus system tracks subjects seamlessly, making it particularly effective for family sessions where children may move unpredictably.
The Sony α7 IV offers competitive advantages in resolution and battery life, providing photographers with extended shooting sessions without interruption. Its 33-megapixel sensor captures intricate details that remain sharp even when printed at larger sizes. The camera’s silent shooting modes prove invaluable during intimate moments when preserving natural expressions requires minimal distraction.
Portrait lens selection: 85mm f/1.4 vs 50mm f/1.2 focal length analysis
Lens choice dramatically influences the aesthetic quality and emotional impact of portrait photography. The 85mm f/1.4 lens creates beautiful subject separation with its natural compression, ideal for individual portraits and close-up family groupings. Its focal length allows photographers to maintain comfortable working distances whilst achieving stunning background bokeh that draws attention to subjects.
The 50mm f/1.2 lens offers greater versatility for environmental portraits and larger family groups. Its wider field of view captures more context whilst maintaining excellent low-light performance. The lens excels in smaller spaces where backing up further isn’t feasible, making it indispensable for indoor family sessions.
Godox AD600Pro flash system configuration for outdoor shoots
Consistent lighting control enables photographers to create professional results regardless of available natural light conditions. The Godox AD600Pro system provides sufficient power to overcome harsh midday sunlight whilst maintaining natural-looking illumination. Its wireless triggering capabilities allow creative positioning without limiting photographer movement during dynamic sessions.
Proper flash configuration requires understanding power ratios and light modification techniques. Using softboxes and beauty dishes transforms harsh direct flash into flattering illumination that enhances rather than overwhelms natural features. Strategic flash placement fills shadows whilst preserving the ambient lighting that creates mood and atmosphere.
Manfrotto tripod stability requirements for group photography
Stability becomes crucial when photographing larger family groups requiring precise composition and sharp focus throughout the frame. Professional-grade tripods like the Manfrotto 055 series provide the necessary stability for consistent framing whilst accommodating various height adjustments for optimal shooting angles.
Group photography often requires longer focal lengths and smaller apertures to maintain sharpness across multiple subjects. Tripod stability eliminates camera shake that could compromise image quality, particularly in lower light conditions where slower shutter speeds become necessary. Quality tripod systems also enable precise composition adjustments during setup, ensuring everyone appears properly positioned within the frame.
Location scouting and environmental photography considerations
Golden hour timing calculations using PhotoPills app
Choosing the right time of day can transform an ordinary photo shoot into a breathtaking memory. The golden hour – the brief window just after sunrise and before sunset – offers soft, flattering light that smooths skin tones and adds a warm glow to your images. Rather than guessing when this light will occur, professional photographers rely on tools like the PhotoPills app to calculate precise golden hour timings for each specific date and location.
Within PhotoPills, you can set your shooting location, select the desired date, and instantly view sunrise, sunset, and golden hour intervals. This level of planning is invaluable when you are offering a photo shooting as a gift session, as clients often have limited availability and expect you to maximise the conditions. By sharing suggested start times based on PhotoPills calculations in advance, you demonstrate expertise and reassure clients that their memories will be captured in the most flattering natural light.
Beyond simple timing, PhotoPills also provides sun position and elevation, allowing you to anticipate where light will fall across your chosen location. You can visualise how the sun will backlight a couple, skim across a family group, or filter through trees during a lifestyle session. This forward planning means that, when your clients arrive, you are not searching for light; you are confidently guiding them into pre-scouted spots where the golden hour works in your favour.
Natural light modifiers: reflector positioning for rim lighting
Natural light is beautiful, but it is rarely perfect on its own. Simple modifiers like reflectors allow you to shape existing light, adding depth and dimension to portraits without overwhelming the natural atmosphere. One powerful technique for memorable family and couple portraits is rim lighting, where the sun creates a glowing outline around hair and shoulders, subtly separating subjects from the background. Used well, a reflector completes this setup by lifting shadows on the face while preserving that magical halo.
To achieve balanced rim lighting, position your subjects with the sun behind or slightly to the side of them, just out of the frame. This creates the backlit edge, but can also leave faces in shadow. A white or silver reflector placed in front of the subjects, angled towards their faces, bounces light back to fill those shadows. Think of it as adding a gentle second sun at a lower intensity, ensuring expressions remain clear and flattering while the background retains its dreamy glow.
The person holding the reflector – whether an assistant or a helpful family member – should stand just outside the frame at around a 30–45 degree angle from the subject. Moving the reflector closer increases the strength of fill light, while stepping back softens the effect. During gift photo sessions with children, reflectors can double as playful props, keeping kids engaged while you fine-tune the lighting. With practice, you will learn to read the catchlights in the eyes and the softness of the shadows, adjusting reflector position until everything feels natural and cohesive.
Urban photography permits and location release documentation
When you offer a photo shooting in urban environments – city parks, historic districts, or iconic landmarks – you step into a space where permits and permissions may be required. Many municipalities now regulate commercial photography in public areas, especially if you use lighting stands, tripods, or block pathways. Ignoring these rules can lead to interrupted sessions, fines, or even tense interactions in front of your clients, none of which contribute to a relaxed, memory-making experience.
Before confirming an urban location, research local regulations on city or council websites and contact venue managers if you are shooting on private property such as hotels, cafés, or event spaces. A simple email requesting permission and outlining your intended use often results in written approval or a location release form. This release not only protects you legally but also clarifies how images can be used for marketing, social media, or portfolio display. When you explain this process to clients, you reinforce the professionalism behind their gift photo session.
For recurring locations, it is wise to maintain a digital folder with copies of permits and signed releases, dated and clearly labelled. Having documentation at hand, whether on your phone or tablet, helps resolve any on-site questions quickly and calmly. Clients rarely see this administrative work, but they feel its impact: a seamless session, uninterrupted by security concerns, focused solely on capturing the connection and laughter that make their memories last.
Weather contingency planning for outdoor portrait sessions
Weather is one of the few elements we cannot control, yet it has a profound effect on outdoor portraits. A sudden downpour, strong winds, or unexpected haze can disrupt carefully laid plans and drain the excitement from what was meant to be a special photo gift. Instead of leaving conditions to chance, professional photographers build weather contingency plans into their workflow, communicating options clearly with clients from the very first consultation.
Start by monitoring reliable forecasts 3–5 days before the session and again 24 hours in advance. Share updates with your clients so they feel involved rather than anxious. If heavy rain or extreme heat is predicted, propose backup dates or alternative indoor locations in your initial agreement. You might, for example, offer a lifestyle session at the client’s home or a studio-based shoot if the park becomes unsuitable. Framing this as part of the service – not as an emergency measure – reassures clients that their gift photo shoot is safe in your hands.
On overcast days, remind clients that clouds often act as a natural softbox, creating even, flattering light ideal for portraits. Light rain can even add romance and uniqueness, especially with umbrellas, reflections, and misty backdrops. By communicating the creative potential of different conditions, you help clients stay positive and engaged. Ultimately, the memories they treasure will not be about the forecast, but about how you guided them through the experience with calm confidence.
Client communication and pre-session planning protocols
Exceptional images begin long before the camera is switched on. When you offer a photo shooting as a meaningful gift, the pre-session communication you provide is just as important as the technical skills you bring on the day. Clear protocols for emails, calls, questionnaires, and guides ensure that clients feel informed, understood, and excited instead of uncertain or nervous. This preparation builds trust and dramatically increases the chance of capturing authentic, emotional moments.
A structured pre-session workflow typically starts with a discovery call or detailed email where you clarify the session’s purpose: Is this a multi-generational family portrait, a surprise engagement, or a “just because” experience? From there, a simple questionnaire can gather information about personalities, preferred colours, wardrobe choices, and any sensitivities such as camera-shy family members or neurodivergent children who may need extra time. This information allows you to adapt your approach and create a session that feels tailor-made.
To reduce anxiety and set expectations, many photographers send a digital welcome guide that covers what to wear, how to coordinate outfits, and what the session timeline will look like. Including sample poses and explaining that you will provide gentle direction helps clients who worry about “not knowing what to do.” Confirming logistics – time, meeting point, parking, and payment details – at least 48 hours before the shoot prevents last-minute confusion. When clients arrive feeling supported and well-prepared, they are far more likely to relax, engage, and create the kind of memories that make a photo shoot gift truly unforgettable.
Advanced lighting techniques for memorable portrait photography
Once equipment, location, and planning are in place, lighting becomes the critical tool that elevates your work from simple documentation to artistic memory-making. Advanced lighting techniques allow you to sculpt faces, highlight emotion, and create a consistent style that clients recognise and value. Even when using a single key light and a small fill source, understanding classic portrait patterns helps you adapt quickly to different face shapes and client preferences.
Think of these lighting styles as different brushstrokes in a painter’s toolkit. Each one shapes the mood of the final image, whether you want soft, romantic family portraits or bold, dramatic character studies. By mastering Rembrandt, butterfly, split, and loop lighting, you can respond creatively in any setting – a home, a studio, or a location – and ensure that every gifted photo session yields images that feel intentional rather than accidental.
Rembrandt lighting setup using key light and fill flash
Rembrandt lighting is named after the Dutch painter who often depicted faces with a distinctive triangle of light on the shadowed cheek. This pattern is ideal when you want portraits that feel timeless and slightly sculpted, perfect for legacy images that will hang on a wall for years. To create it, position your key light at roughly 45 degrees to one side of the subject and slightly above eye level, angled downwards.
The goal is to allow the shadow from the nose to connect with the shadow on the far cheek, leaving a small illuminated triangle under the eye. If the result looks too contrasty for a family session, you can soften it by adding a low-power fill flash or a reflector on the shadow side. This preserves the characteristic triangle while lifting dark areas enough to keep expressions readable and flattering. In practice, you will often adjust your light by a few centimetres at a time until the triangle appears clean and balanced.
Why is this important for memory-making photography? Rembrandt lighting creates depth and character without feeling overly stylised. Grandparents, parents, and teens alike often appreciate how it slims the face and emphasises eyes. When you offer a photo shooting that aims to become a cherished heirloom, this kind of subtle, classic lighting helps ensure the images age gracefully rather than feeling tied to a passing trend.
Butterfly lighting execution for fashion photography sessions
Butterfly lighting, also known as Paramount lighting, is commonly used in fashion and beauty photography for its flattering, glamorous effect. The name comes from the small butterfly-shaped shadow that appears directly under the nose. To achieve this, place your key light directly in front of the subject and slightly above head height, aiming downwards toward the face. A softbox or beauty dish is often ideal for maintaining soft transitions between light and shadow.
This setup emphasises cheekbones, reduces the appearance of under-eye shadows, and creates a smooth, even tone across the face – qualities many clients appreciate during personal branding or styled portrait sessions. For added refinement, you can introduce a reflector or low-powered fill light below the subject’s chin to soften shadows further. The result is a polished, editorial look that still feels approachable when you maintain relaxed expressions and natural posing.
Butterfly lighting works particularly well when you are offering a gift photo shoot intended as a confidence boost – perhaps a makeover session, milestone birthday portrait, or celebration of a personal achievement. The lighting enhances features in a flattering way, helping clients see themselves as strong, stylish, and worthy of being centre stage. Those images often become daily reminders on bedroom walls or office desks of a moment when they felt truly seen.
Split lighting configuration for dramatic portrait effects
Split lighting divides the face into equal halves of light and shadow, creating a powerful, cinematic look. This is achieved by positioning the key light 90 degrees to one side of the subject, so it illuminates one half of the face while leaving the other in shadow. The effect is dramatic and moody, ideal for conceptual portraits, musicians, or personal projects where you want to convey mystery or strength rather than gentle warmth.
Because split lighting can feel intense, it is often used sparingly within a broader gallery from a session. For example, during a family gift shoot, you might reserve this style for a few individual portraits of parents or older teens who appreciate a more artistic look. A subtle fill source or reflector on the dark side can be introduced if the contrast feels too harsh, particularly when printing for home display where extremely deep shadows may not reproduce well.
In the context of memory preservation, including one or two dramatic split-light portraits can add variety to an album and give clients the sense that their session was bespoke, not cookie-cutter. They will remember not only the comfortable, smiling images but also the moment they stepped into a more cinematic version of themselves, which can be especially meaningful for clients who rarely take time to be photographed alone.
Loop lighting technique application in commercial headshots
Loop lighting is one of the most versatile and commonly used patterns for portraits, especially in commercial headshots and lifestyle branding sessions. It strikes a balance between flattering and natural, making it ideal when clients need images for professional use while still wanting to look approachable and human. To create loop lighting, position the key light about 30–45 degrees to the subject’s side and slightly above eye level.
The tell-tale sign of a correct loop light is a small shadow from the nose that angles gently downwards and to the side, without touching the shadow on the cheek. This creates soft modelling on the face without the strong contrast of Rembrandt lighting. A reflector or subtle fill light on the opposite side keeps details in the shadowed area while maintaining enough depth to avoid a flat, passport-style look.
When you offer a photo shooting as a corporate or personal branding gift, loop lighting allows you to deliver headshots that work across LinkedIn, websites, and marketing materials. Clients see themselves clearly, with well-defined features and friendly expressions, which can have a tangible impact on their confidence in professional environments. In this way, a carefully lit headshot becomes more than just an image; it becomes part of the story they present to the world.
Post-production workflow for professional photo delivery
The experience clients remember does not end when the camera is packed away. Post-production is where raw files are transformed into polished, cohesive galleries that tell the story of the session. A consistent, efficient workflow ensures that every step – from backing up images to final delivery – supports reliability, quality, and brand identity. When clients know exactly when and how they will receive their images, their anticipation becomes part of the overall joy of the gift.
Professional photographers typically follow a structured sequence: import and backup, culling, base corrections, detailed retouching, export, and delivery. Each stage adds a layer of refinement, much like chiselling a sculpture from stone. Clear communication about timelines and the difference between basic edits and advanced retouching helps manage expectations. This clarity allows you to focus on your craft while clients confidently await the final images that will preserve their memories for years to come.
Adobe lightroom classic batch processing colour correction
Lightroom Classic forms the backbone of many photographers’ post-production workflows, particularly for colour correction and global adjustments. After importing and backing up files to at least two separate drives, the first task is culling – selecting the strongest images from the session. Once these selections are made, you can apply a base editing preset that reflects your brand style, adjusting white balance, exposure, contrast, and saturation to create a consistent look across the gallery.
Batch processing is particularly valuable when you have shot in consistent lighting conditions, such as a studio or a single outdoor location during golden hour. By synchronising settings across similar images, you maintain uniform skin tones and colour harmony, which is essential when delivering albums or wall art collections. Fine-tuning can then be applied to individual files where needed, such as lifting shadows on a key family portrait or slightly warming a close-up to enhance emotional impact.
This efficient colour correction process allows you to spend more time on creative decisions and less on repetitive tasks. For clients, that translates into faster turnaround times without sacrificing quality. When a gifted photo shoot leads to a gallery where every image feels part of a cohesive visual story, families are more likely to print, share, and revisit those photos, strengthening the emotional value of your work.
Photoshop frequency separation retouching for skin enhancement
While Lightroom excels at global edits, Adobe Photoshop is indispensable for detailed retouching, especially on close-up portraits. Frequency separation is a professional technique that separates the texture and colour/tone information of an image into two layers. This allows you to smooth uneven skin tones and reduce minor blemishes while preserving pores and fine detail, avoiding the dreaded “plastic” look.
In practice, you create two copies of the image layer: one blurred to represent colour and tone, and one high-pass filtered to capture texture. By working on these layers independently with soft brushes, you can subtly correct blotchiness, redness, or shadows under the eyes while retaining natural texture. The result is a polished yet realistic appearance – as if your subject is having their best skin day, not wearing a digital mask.
For memory-focused photography, this level of careful retouching is particularly important on larger prints and albums that will be viewed up close. The aim is not to erase identity or life experience, but to minimise distractions so that viewers focus on expression and connection. When done well, clients simply see a version of themselves that feels both authentic and gently refined, enhancing their willingness to display and revisit the images over time.
JPEG export settings for web gallery optimisation
Once editing and retouching are complete, proper export settings ensure that your images look their best across screens and platforms. For online galleries, social media, and email delivery, JPEG remains the standard format. Exporting at a resolution of around 2048–3000 pixels on the long edge with a quality setting between 80–90% typically balances visual fidelity with manageable file sizes. This helps galleries load quickly while retaining detail and colour depth.
Converting your colour space to sRGB on export ensures consistent display across most devices and browsers, which may not correctly interpret wider colour spaces like Adobe RGB or ProPhoto RGB. Adding subtle sharpening tailored for “screen” output compensates for resizing softness and helps images appear crisp online. You may also choose to embed basic metadata and a small, unobtrusive watermark to protect your work while allowing clients to share images proudly.
From a client’s perspective, optimised JPEGs make it simple to post favourites on social media, send images to relatives, or view galleries on tablets and phones. The easier it is for them to access and share their photos, the more frequently those memories will resurface in their daily lives – turning a one-time photo shoot gift into an enduring part of family storytelling.
Print colour calibration using X-Rite ColorMunki display
Digital files are only part of the memory-preservation equation. Printed photographs – framed on walls, collected in albums, or displayed on desks – become physical anchors for family stories. To ensure that prints match what clients see on screen, monitor calibration is essential. Tools like the X-Rite ColorMunki Display measure your monitor’s output and create a custom colour profile, correcting shifts in brightness, contrast, and colour balance.
Without calibration, you may edit images on an overly bright or cool-toned screen, leading to prints that appear too dark or with inaccurate skin tones. Regularly profiling your monitor, ideally every four to six weeks, ensures consistent results over time. When combined with using ICC profiles from your chosen print lab, this workflow minimises surprises and reprints, saving both time and materials.
Clients rarely know what calibration is, but they instantly recognise its impact when their prints look natural and lifelike. When you offer a photo shooting as a special gift, presenting calibrated, professionally produced prints tells families that their memories are worth this extra care. Those prints are far more likely to be cherished, displayed, and passed down, reinforcing the long-term value of investing in professional photography.
Client experience enhancement and memory preservation strategies
Technical excellence is important, but what clients remember most is how a session made them feel. The true art of offering a photo shooting lies in turning a practical service into a meaningful experience – one that begins with anticipation, unfolds with connection and fun, and ends with tangible keepsakes that grow more valuable over time. Every touchpoint, from your first email to the final delivery of albums and wall art, contributes to this emotional journey.
Start by framing your sessions as experiences rather than transactions. Instead of simply listing packages, describe how you guide families through outfits, locations, and posing so they can relax and enjoy each other. On the day of the shoot, build in time for conversation and unposed moments, especially with children who need space to warm up. Some of the most treasured images often come from in-between moments – shared jokes, quiet hugs, or spontaneous games – rather than the perfectly arranged group shot.
After the session, consider hosting an in-person or virtual reveal where clients see a curated slideshow of their best images for the first time. Presenting photos this way, rather than sending a simple link, elevates the sense of occasion and helps families choose which memories they want to live with daily. Offering thoughtfully designed products – photo books, framed collections, and keepsake boxes – encourages them to move beyond screens and into print, where images are less likely to be lost in digital clutter.
Finally, build long-term relationships by checking in around anniversaries, birthdays, or milestones and offering returning-client benefits. A child’s first birthday session can naturally lead to yearly family updates, graduation portraits, and beyond. In doing so, you become more than a photographer; you become a visual historian for the family. Each new session adds another chapter to their story, ensuring that the memories you help create today will be revisited, shared, and loved for decades to come.